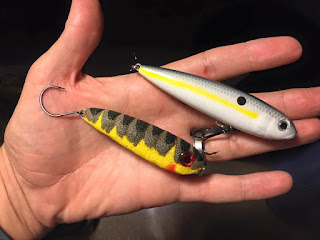
Once all of the deer hair was stacked and trimmed, I used a wood burning tool to hollow out a small cavity for the second tungsten bead about 2/3 back from the head of the fly. Tank testing with beads tied to the fly with old tippet material told me which size beads to use for proper weighting. I tried my best to match the resting angle of the conventional lure side-by-side in the test tank.
The result was a very similar look and balance between the conventional lure and my fly. At that point, I just had the lingering bit of doubt, would it behave the way I envisioned it would behave when retrieved? To be perfectly honest, I did not expect the walk-the-dog action to be as violent as the conventional lure. I was never so happy to be so wrong! The side-to-side motion of the fly was sharp and violent, just like the conventional lure.
I was able to film the fly in action on a cold wintery day. No fish were going to be had in those conditions, but I wanted to document the action of the fly.
As of yet, I have not been able to fish this pattern. I can't wait to finally get out on the water this summer and see some bass blow this thing up!


Hi Jeff, this pattern is exactly what I've been looking for. Would you mind sharing what size tungsten beads you found works best to get that action? Can't wait to give this a try.
ReplyDeleteHi Jeff, how is the tungsten bead in the hollowed out section secured to the fly?
ReplyDeleteWhat size tungsten bead worked the best?
ReplyDeleteThis just seems like an exhibition of your tying skill and not a lot of help to anyone who would like to relocate this fly without doing a bunch of trial and error to get it correct. Congrats I guess? Would be nice if you provided tying tips or even a video.
ReplyDeleteReplicate*
Delete