Wednesday, June 29, 2016

Balsa Bugs

Apparently, several years ago when I painted a lot of hard-bodied surface bugs, I bought a few sizes of balsa to create my own heads.  I forgot all about it.  For the past few years, I have tied surface bugs for bass and bluegill out of soft foam or deer hair, with most being deer hair.  I rediscovered the balsa during a cleanup last weekend, so I decided to give a few balsa bugs their long overdue effort.

I did a half dozen smaller size 6 poppers to start.  I cut the balsa blocks to the desired length for the head with a razor blade, mounted a nail through the blocks to act as a mandrel, and turned them on my Dremel tool with sandpaper.


I started with 80 grit sandpaper, which quickly turned the balsa down to cylinders.  From there, for shaping and finer sanding, I switched to 120 grit.  I definitely could have gone finer for a smoother finish, but I used what I had on hand.  Once the bodies were sanded to shape, I used a carving bit on the Dremel to slightly cup the faces, and epoxied them to the size 6 Gamakatsu B10S hooks.  I laid a small foundation of dubbing on the shank, applied the epoxy to the dubbing, and slid the heads on.


Painting these is a chore by hand, and my way takes time.  I prime the bodies with solid white paint to start.  Then coat the body in the primary body color and color the face portion red or orange.  Stippling is done after that dries to add some design and contrast to the body, as well as eyes.  Once the paint is all dry, I apply a heavy coat of Delta Sparkle Glaze, which both helps seal the body and gives it a glittery finish.  I top coated these bodies with Hard as Hull for some added durability.  That takes a lot of time...the actual tying part takes 5-6 minutes, tops.  The tying portion is simple: Lazer Dub for the tail, some rubber legs, and Ice Chenille or Estaz for the collar. 


Once those were done, I started a new-to-me design idea to hybridize a bug with balsa and deer hair.  The idea was to make a highly buoyant, weedless frog pattern that could be drug over weeds and pads without hanging up.  For this idea, I used larger diameter balsa (3/4"), a size 1 Gamakatsu SP113L3H hook, and a large size Cohen's Creature Frog Leg.


Once the bodies were rounded down to the shape and size I wanted, I mounted them to the hooks with the same epoxy method as mentioned above.  I couldn't leave the body completely round, so to free up some hook gap I sanded the belly pretty flat then slightly rounded the edges.


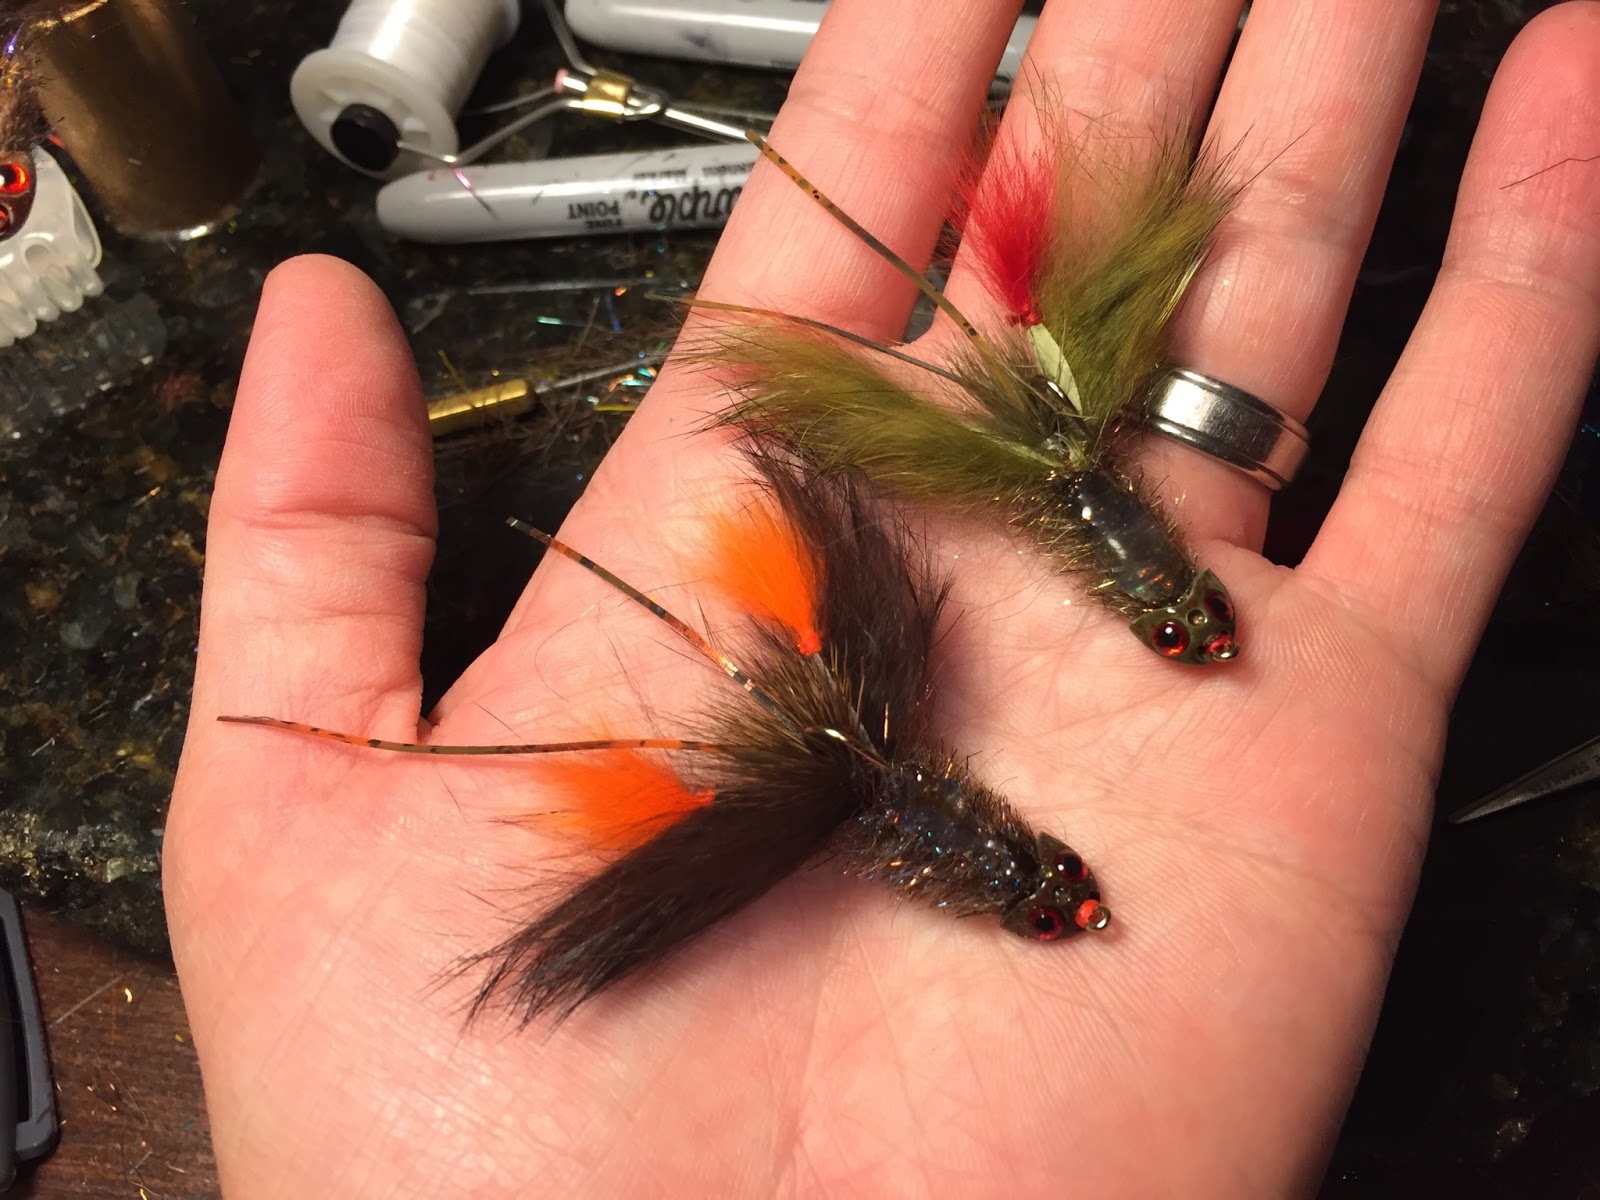
I did the same painting process on these frog patterns, but instead of Hard as Hull as a top coat I used a heavy coat of Liquid Fusion and allowed them to dry for a few hours on my drying wheel.  Once dry, I added the twin weed guards, colored Frog Legs, and squeezed in a collar of deer hair.  I shaved the deer hair flush with the body.  The rubber legs I threaded through the body by punching a hole with a needle, then using a bobbin threader to pull a set of legs through the body.  Here's the final result.


It should be a fun pattern to field test when I get time.  I'd love to drag it through some lily pads in a few local lakes and see if the bass want to blast the frog.  It's an exciting way to fish with pretty explosive takes.  It will be interesting to see how the balsa holds up.


Wednesday, June 22, 2016

Video Tutorial for the Synthetic Hippy

Here is an instructional video on the Synthetic Hippy streamer previously posted here.  It's a pretty simple fly to tie, not a whole lot to it.  Enjoy!


Friday, June 17, 2016

The Synthetic Dirty Hippy

For several years, one of my favorite streamers for both warm and cold water species has been Charlie Craven's Dirty Hippy.  It's a fun tie, it casts easily, has a great profile, has a great (slow) sink rate, and the fish love it.  Tinkering with known patterns is something I enjoy doing.  Swapping materials, adding something extra, I like adding my own twist on patterns like these.  Curiosity set in last night, and I decided to see if I could tie a fully synthetic Dirty Hippy with some materials I had in better supply than some of the natural materials used in the pattern.  The recipe I followed was:

Hook - Size 4 3XL streamer hook
Weight - 10 wraps .020 lead and a medium cone head
Body Flash - Large lateral scale
"Gills" - Ice Chenille
Flash - Rainbow Flashabou
1st Belly - Laser Dub
1st Back - Faux Fox
2nd Belly - Laser Dub
2nd Back - Laser Dub
Head - Ice Dub
Eyes - Size 4 Fish Mask and 3D eyes

This recipe deviates from the original with materials tied in behind the cone.  The lateral scale adds some body flash, and the Ice Chenille bleeds through the body and belly materials for a great "gill" effect.  Other materials I have swapped for this rendition are the Faux Fox for marabou, and Laser Dub for the arctic fox.  The original Dirty Hippy also uses Ice Dub for the head, but I used a Fish Mask for this version instead of gluing eyes directly onto the head.


In hand and on the vise, I really like the way this turned out.  This size will be great for small stream bass and should maintain the slow sink rate and easy casting that I knew to be great assets of the original pattern.  Hopefully this fly will get some thorough testing soon. 

Tuesday, June 14, 2016

Fly Tying Tutorial: The HD Craw

The HD Craw is a crawfish pattern I have been tinkering with for a few months and feel I have it dialed in pretty well.  This fly gives the profile I wanted, the right sink rate, and is castable on lighter fly gear if you drop down in rod weight.  You don't need a 6wt to chuck this fly, I did great with it on a glass 3wt during testing.  There are two ways I have weighted this fly, 1) with a mini Sculpin Helmet and 2) with a Flymen Cray Tail, lead wire, and a tungsten bead.  The Sculpin Helmet is clearly the easiest and fastest from a tying perspective, but I like the realism from the Cray Tail.  Here is the Sculpin Helmet version:


And here is the Cray Tail version of the same fly pattern:


In both versions, I use Pro-Tec Powder Paint to add an extra dimension of detail to the Cray Tail/Helmet.  It's quick and easy, and helps make the fly pop.  The recipe for the Cray Tail version is as follows.

Hook - DaiRiki 700B size 6
Thread - 6/0 and 200den GSP (for the deer hair)
Weight - Small Cray Tail, .020 lead, 5/32" tungsten bead
Antennae - Rubber legs
Mouth/Spreader for Pincers - Deer body hair
Pincers - Micro rabbit strip with Arctic fox hot spot/tips
Body - Arizona Diamond Dub 
Shellback - Hot melt glue

And here is the video tutorial:


I fished the Sculpin Helmet version pretty hard last weekend and it did not disappoint.  I caught several smallmouth bass and a rock bass on this fly, including a personal best on the fly in this stretch of a small flow.


Monday, June 13, 2016

The Deer Hair Spook

For several years, I had the thought "Wouldn't it be great if you could match a Zara Spook's action with a fly?" Of all places, where this thought became a plan was perched about 22' off the ground in a tree stand during a slow night in Ohio's archery season.  It suddenly hit me that a large articulated shank would be the key piece in making this work.  Since it was a slow night, I pulled out my phone and actually ordered the materials I needed to make this work from the stand.  Knowing that balance was going to be important in making the fly mimic the conventional lure, I headed to the local WalMart a few days later and bought a Strike King version of the lure.  The "chassis" for the fly was going to be an articulated shank with an octopus-style hook, one tungsten bead off the rear of the shank, and another embedded in the belly of the deer hair body.


Once all of the deer hair was stacked and trimmed, I used a wood burning tool to hollow out a small cavity for the second tungsten bead about 2/3 back from the head of the fly.  Tank testing with beads tied to the fly with old tippet material told me which size beads to use for proper weighting.  I tried my best to match the resting angle of the conventional lure side-by-side in the test tank.


The result was a very similar look and balance between the conventional lure and my fly.  At that point, I just had the lingering bit of doubt, would it behave the way I envisioned it would behave when retrieved?  To be perfectly honest, I did not expect the walk-the-dog action to be as violent as the conventional lure.  I was never so happy to be so wrong!  The side-to-side motion of the fly was sharp and violent, just like the conventional lure.


I was able to film the fly in action on a cold wintery day.  No fish were going to be had in those conditions, but I wanted to document the action of the fly.  


As of yet, I have not been able to fish this pattern.  I can't wait to finally get out on the water this summer and see some bass blow this thing up!


About the Author

As a lifelong resident of Southeast Ohio, I have not exactly grown up in a fly fishing mecca.  My interests in fly fishing began with the "gateway drug," bluegill.  I did not take fly fishing too seriously until I began going into the mountains of West Virginia chasing wild small stream trout.  From there, the fly fishing bug took over and I now fly fish for virtually everything that swims in reasonable driving range of home.  Fly tying soon followed out of a desire to have specific fly types and color combinations to chase my local fish, and these were not typically available commercially.  Early on, my fly tying tools and materials all fit neatly into a small metal tool box that I made in high school shop class.  Now, it has expanded to a designated fly tying room in the house with several towers full of materials.  I am a very detail-oriented person, and I try to build that detail into every fly.  I will tie virtually any fly type, but the majority of my work centers on warmwater species in small rivers and streams.  I have a soft spot for small water that holds bigger-than-expected fish that are a blast on light fly gear.